Introduction / Easy stuff / Sniper Target Acquisition /
Hitting the target / Other things to know / The Sniper War
Imagine that the following was all the training that you needed to play the sniper:
"SNIPER: If you feel your skills are better suited for attacking from a distance, and you don't have the intense hand-eye co-ordination required for toe-to-toe confrontations, the Sniper might be the choice for you. More suited to defensive use than offensive base strikes, the snipers usually position themselves on the battlements and snipe enemies coming across the bridge."
I wonder what would happen?
You have connected, you've run out of the door in 2 forts, into the sun...

... and your dead.
This was a real description of the sniper character on a real half-life website, and its pathetic, wrong and obviously written by a idiot who couldn't hit a barn door with a banjo!
The facts of life?
Snipers need to think!
Snipers need amazing hand eye co-ordination. They only have a bullet one inch across not a massive explosive rocket. Which do you think is harder and requires more hand-eye co-ordination to aim?
I'm glad you agree.
So lets learn this the most skilled of playing classes, lets learn
THE ART OF THE LONG RANGE GUN
Before we start know this: as a sniper you are going to get killed. A lot. If your the sort of person who gets made angry by this then be some other class. To shoot straight you need to be cool, be able to laugh at your opponents, and also congratulate them on a fine shot or move. Over all else you need to have fun, and learn from your mistakes.
Ok back to school. Remember Quake 2? In that game you had a sniper rifle of sorts, but as far as armour and speed and all other values went you were the same as everyone else. TFC is very different. The sniper isn't the fastest or strongest or the best armoured - but after I've finished with you he will be the smartest.
I've been playing TFC since day one and TF before that and I became very fed up of snipers not using that which God gave them - an IQ.
SO here's where we start really playing: shooting lessons...
First the easy stuff. You have spawned in the reload room of 2Forts (But remember the tactics apply anywhere!)
- Get a red armour and pick up the green pack that is in the middle of the two doors, this should give you an extra two grenades.
- Before you leave: drop all non sniper ammunition so that your team mates are not kept waiting for the re-spawn.
- Move at speed out of the doorway so that your don't block access from the re-spawn area.
As you leave watch for enemy activity inside your base. Never just run through, because a waiting spy or major attack can bite your arse.
- Move towards the sniper nest overlooking the yard, bridge and opposing snipers.
(At this point your are out of sight, but watch for other classes rocket jumping up onto this ledge)
- DO NOT move into the open until ready to fire.
- Watch the wall facing the opposing snipers for the red dot from their guns.
- Many times I have seen snipers rush out to the next part of cover to avoid bottle necks but I don't do this because it invites a Low Ping Bastard to shot you on the move.
- Congestion up there will mostly be someone with the flag trying to get your team points - GET OUT OF HIS WAY. But such occurrences are rare due to the Scouts skill in avoiding people in his way.
- Start to charge your gun but remember:
- The sniper rifle has to charge up. When you press the button (This is using my alias or script) the gun starts to charge and the red dot becomes visible. More on the dot later, at this moment you have a shot available but it will be weak, around 50 points of damage. It is very hard to kill anyone with that amount to firepower.
- After two seconds of charging your shot will do more damage, but will not usually gib someone unless you shot them in the face (see below).
- After three seconds you are very dangerous, but will be moving very slowly indeed. At this point you should move into shooting position and start Sniper Target Acquisition.
THE DOT
ONE SECOND THREE SECONDS Notice the difference? Know your own weapon!
- Once fully charged you may move in to the line of fire.
- SLOWLY!
- DO what is called in the shooting game, "Slicing the pie" :
Stand by the edge of the open space, BUT NOT AGAINST THE WALL. This is because the game may draw some part of your body through the wall. This gives the opposing sniper plenty of time to get the dot onto the space you are about to move into.
Switch to zoom. This allows you to shot instantly you get a target. Notice the redness of the dot on the wall. That is your indication of how charged your rifle is - as the shot charges it gets redder and stronger.
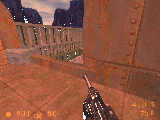
Start to move out to your left while at the same time keeping the dot on the corner. Slowly the opposing nest will become visible. From here you can start to pick targets. If there is a sniper at this point shoot him in the head, and start again from 1. (See Screen shot)
Notice my red dot is on the opposistions corner. At this point I am still covered by the wall from shots by anyone I cannot see.
If there is no sniper keep going around. At this point enemy snipers are your first priority.
Notice that my red dot while panning keeps level. This alcove is a favourite spot for new snipers. I have now lost my wall cover but I have not seen any targets capable of hitting me.
Once you have the whole opposing nest in view you may start to Dominate.
This corner is the final thing you see before moving further out into the open. This technique allows you to focus your one shot while at the same time limiting the amount of shots that the enemy can throw at you.
When you are new to the map the opposition may have snipers on their team, perhaps even good ones. You therefore have to dominate the section of the map before you can start to zap enemy flag carriers. Remember on a level like this kill the snipers first! And be relentless about it. This gives the first benefit of the sniper:
- Once the way is clear your team will be able to move out into the open easier.
And allows you to start to give your team the next benefit of the sniper:
- You are like the finger of god taking the life from the opposing players. Well perhaps that is a bit of an exaggeration. But if you can hit all your targets you are doing the basic part of your job, which is what this lesson is about showing you how to achieve.
However, you do actually have to hit the target.
Hitting the Target. First things first. where are you? You should be:
- In an ideal position to SEE the target.
- In an ideal position to AIM AT the target.
- In an ideal position to JUDGE where the target is, was, and is going to be.
- In an ideal state to KILL the target.
SEEING
- A man who can't SEE, can't AIM AT the target.
- Move your arse into a spot where you can see as much as is possible while at the same time allowing as little as possible see you. Walls are ok but beware the bug described above. The best place is shadow. See MAP SPECIFIC HIDING POINTS for a detailed list of the places.
- The basics of shooting are easiest when in the open:
Here I am in the open. This is due to there being no snipers to kill. From this point I can see all of the opposing fort and can grenade the bridge if I have to. Also this slight alcove above me will protect my newbie arse from rocket fire somewhat. Any opposing team member will come into my hit range and target calculations. Notice that my gun is in shadow, this means that I am slightly less visible to the enemy. More importantly I can move away from returning gun fire with ease. All I have to do is shoot and I have full speed available again. REMEMBER: if you have to move quickly shoot, unzoom, and run right or left to cover.
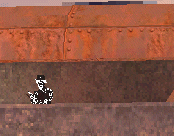
In the second picture you can see what I look like from the other nest. Notice how my figure is silhouetted against the light background. A better sniping position would be to the right of here which has a darker background and wont present such a easy to see silhouette.
AIMING
- A man who cant AIM AT the target cant JUDGE when it is best to kill the target.
- From a spot like that one above and opposing player coming at my fort will have to run across the bridge.
- The key word here is HAVE TO.
- If he has to move into my sights then I am in a good position, because if I miss then my follow up shot will not require me to move.
- For example a scout runs across the bridge. From this vantage point I can get my first shot off at him at full power.
- I can then get a 2nd "two second" power shot off before he gets too close for me to hit him.
- From a corner angle like the "slicing the pie" angle above I can move out to the ledge and get a third shot off at him before he gets into my base. THIS is where the good sniper would be, but it is the position with the most risks.
- From this position however I can defend my dominance easier than I could before.
- Therefore when one man comes into view across the bridge I would stay here.
- BUT when a full strike party come across shooting rockets everywhere I would hit the first one from here and then move left or right until I was in the open to get the fastest player across the bridge.
(1st picture) Here I am moved to the left. From here I can see my own ramps and therefore defend right until the last possible moment.
(2nd picture) If I had stayed in the middle I could find myself in this position. I have one chance to kill this soldier before he makes it to the cover of my base.
In the 1st picture I could get off another shot or even jump down after him.
 |
|
JUDGING
A man who cant JUDGE when is the best time to shoot the target cant KILL the target.
A target is able to be shot when it is in the direct path of your red dot.
NOT when you are pointing at it.
The red dot is lagged behind your movements, and this lag is dependent on many things
- Game lag. Very common.
- Machine lag. As above but this is your fault. If you find that it is running too far behind use a speedup script like can be found in SNIPER CONFIG.
- Fast movement.
Listen very carefully to what follows:
The red dot always follows your movement by the most direct line.
This means that if you are lagged and move from left to right BOBBING up and down, the red dot will just move straight. SO WHY BOB?
When the connection is right the dot will copy your movements like you were laying out little flags for it to follow. But when you stop it FLY'S straight to you!
This is rare. Even with a 100 ping like mine the dot position has to be judged instantly.
The BASIC trick to this is as follows, for a more advanced lesson goto ADVANCED SHOOTING:
- When panning the gun to a quickly moving target on your right:
- Pan past the target and shoot on its right.
- By the time the red dot has caught up with you the shot will be on its way.
- If you can time this right then the dot will be over the target when the bullet fly's, and you will hit it.
- ZAP!
- This is may sound complicated to explain but is something that comes quite naturally to you when playing.
- It much like catching a tennis ball. All sorts of complicated mathematical functions are joining on in your brain to work out trajectory, spin, wind, etc. You are unaware of any of this, you merely catch the ball!
- The phrase I'm looking for here is: instinctive judgement.
The only way to learn this is to practice. Good luck!
KILLING
- He who cant KILL the target shouldn't play as a sniper.
- If all of the above considerations have been taken into account, then only one thing remains the kill itself.
- Breath and relax that finger, dont move the mouse!
- As you probably know the sniper rifle does different damage dependent on where you hit the target.
LEG SHOT
If you hit anywhere in this region of the opponent, then it will have an effect on their movement. A direct hit will halve their movement value. A second direct hit will half it again. This slows attacker down to a crawl enabling other team members or your second shot to finish them off.
They will of course take normal damage but it is unlikely (though not impossible) to gib someone with this shot. You very rarely have time to pick a point on the target to aim for, so mostly you'll get this shot by accident.
BODY SHOT
The body shot is the easiest shot of all. People instinctively aim for the center of any given target, and so you'll be shooting here a lot. The body shot is a clean hit of 50 - 250 points spread over the opponents armour and health, and will basically put most classes down.
The Spy, Medic, Scout, and Sniper are instantly wasted.
The Soldier and Demoman can sometimes survive (Easy follow up shot :) ).
HWguys can take these and still remain 50% combat effective, i.e. at close range your now dead, and at long range you'll going to need at least another "three second" shot to finish them off. Try to wait as long as you dare before shooting the second shot. If you can, nip back around a wall to charge up, but beware of the deadly grenades of this class.
When shooting at a Sniper aim for this section to knock him back off his perch if you don't kill him (this would happen if for example your fighting a sniper war - see below).
In the ADVANCE SHOOTING section I will lead you through the technique of using the body height to enable you to get more shots to your opponents head.
HEAD SHOT
The most powerful single hit of any class in the game. A hit here on full power will do anyone because you get X2 damage. This is where the good players hit, they don't have to aim for it because of the way they play (see ADVANCED SHOOTING), and the gibs fly off in all directions!
Hit anyone you can here.
The HWguy needs a pop here to kill him outright, which is lucky because he has an enormous head :)
In my opinion, and ill go into why later, a head shot is easier to get when kneeling, and hardest to get from above.
But basically, keep practising. Learn what I've shown you above and you can regularly get this shot.
- Forget conserving ammo, you'll be dead before you use it all.
- At point blank range you always hit the body. And therefore the HWguy you just bumped into will kill you. So backup and drop a grenade!
- Grenades get you out of all sorts of trouble, use my script with the grenade timer and let one go at just the right time. Don't cook it for too long though, because self-kills are really embarrassing!
- RANGE! RANGE! RANGE!
Medium to long range = GOOD + zoom in
Short range = BAD + zoom out
Point blank range = You better be fully charged - else U B dead!
THE SNIPER WAR
- The Sniper war is what can and will happen if two or more snipers fight each other for dominance of the map.
- As a sniper dominance means everything. By dominance I mean: You can shoot anyone, and no-one can shoot you before you have a crack at them.
- This is what snipers play for, the idea that they are in charge of a map and that the opposition are all shouting to each other "Shit that snipers good!" OR even better shouting at the sniper "£%!"* you!!".
- The feeling of dominance is threatened most effectively by other snipers.
- Put two teams full of crap snipers together and none will get the upper hand OR capture one flag!
- Above I said to be relentless when killing opposing snipers, this is because it free's up your team and allows you to do the better job of killing other classes.
- The sniper war is when the snipers have cancelled each other out so effectively they spend the whole time nuking each other to the detriment of their teams.
So here's what I what you to do:
- Analyse all you targets for game effectiveness. How does killing this sniper for the millionth time help?
- When caught in a Sniper War think of other possessions and ways to get the other hand - DON'T JUST STAND IN THE NEST KILLING EACH OTHER.
- Here is my quick list of the order in which to shoot targets, even if this gets you killed:
- Flag carriers. Especially scouts and HWguys because your team needs all the help it can get to take these classes down.
- Demomen. These guys can annihilate an entire defensive set-up with those bouncing bombs.
- HWguys. Help you team neutralise these sapping menaces.
- Spy's and Medics. Get these support classes for the good of the team.
- Engineers. Ditto.
- Loan Scouts. Where is he off to all alone?
- Snipers. So the sniper is here. Last. Least important. That is not to say you will not encounter a lot of them, because of the way in which the maps are set out most sniper nests face each other. But you know, sometimes killing that flag carrier while you can see the sniper dot in your face and you know you are going to die is the best part of the game.
- To really win the Sniper war see MAP SPECIFIC HIDING PLACES for those little dark corners on which to gain the upper hand. Also see BASIC TEAM WORK for how the others can help!
- Also as I mentioned above shoot for the chest on a sniper when exchanging shots. This enables you to fire that little bit earlier than him and will knock him back, putting him off his aim. Correctly done you can do this three times and kill him before he's even shot at you.
- If you find someone (or even me!) doing this to you try shooting from the hip.
- See ADVANCED SHOOTING for a more comprehensive lesson.
By now you should be ready to go into the battle zone...
But, where is the best place to hide?
This page, pictures, and text were created by Carter. They may not be reproduced copied or printed without prior permission