How does the sniper survive with his limited armour?
How can he battle the other classes effectively?
Lets find out!
Lets look at our chosen class: the Sniper.
The Sniper starts with only 90 health upto a maximum of 140 (although I've never got up there!).
Armour-wise he is in trouble having no armour to start with and a maximum of 50.
This means that he is toast from anything un-armoured, but still going to die very quickly when armoured. I would say that for close combat he is the weakest player because at least the scout moves fast. This is to balance up his enormous long range fire power.
Just for fun lets look at his survival chances against different weapons.
- This comparison is based on a fully armoured Sniper taking a direct hit from the weapon at normal range for its type.
Assault Cannon carried by HWguy
This beast carries 200 rounds and hits with 30 points of damage with every shot. That means at point blank range you will be taking 150 damage a second. That's is to say you'll be taking 150 damage for one second then you'll be mince meat!
However at a longer range its hit rate goes right down. From medium to long range (see ADVANCED SHOOTING) the hits are about one in three which gives you a survival time of around 5 seconds. This is not long enough time for you to charge up twice and kill the HWguy! See ADVANCED SHOOTING for how to achieve the mighty task at close range.
Rocket Propelled Grenade carried by Soldier
This weapon is the choice of the discerning sniper killer. I say discerning because it takes some brains to use it unlike the Assault Cannon, but in the right hands is more than adequate.
It does a neat 95 points of damage on a direct hit. That's right, one hit when you are unarmoured and your toast.
Mind you, having armour doesn't really help because it can manage a high fire rate giving an estimated damage per second rating of 250. More than the Assault Cannon!
The main problem though, is not the direct hit rather the splash damage. Two of these rockets to your feet or behind you at the wall will basically kill you outright again. The rocket also effects your vision due to the explosion, and can throw you high through the air if you jump at the time it hits. The fall from which will almost certainly kill you.
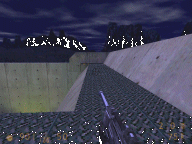
Take this picture above: to my right you can see the blackened impact point of a RPG round. Look how far away it is and then look at my health and armour in the bottom left. 23health 43armour, from just that shot!
However, the Soldier only has 7 at a time to shoot (ONLY!?) and at medium to long range you can avoid them, at the cost of loosing your aimed shot. Basically, kill these guys by being completely out of their visual range or behind them, but not close or in front of them because they wont think twice of firing at such a close range that will also hurt them. It'll kill you.
Super Shotgun carried by Soldier, Medic, Engineer and HWguy
Oh dear more pain coming your way. This is a cut down version of everyone's favourite weapon from Half-Life one player (I used to complete the game with this only just to prove that I could).
At the correct range your going to get around 40 points of damage from one shot and 65 in a second. Therefore 80 points of damage by 1.5 seconds, and death in 2 seconds flat.
At medium to long range your armour is not too bad, and you can take around 10 seconds of damage. Fighting back is hard because the lighter classes carry this and will buzz around you popping you head open in the two seconds you are trying to aim.
However proper Battle Event Planning as seen in ADVANCED SHOOTING will prevent you from dying to this sapping menace in all but the Hunted map, in which you have no grenades. Which is tragic really.
Auto Rifle carried by you and every other Sniper out there
This little baby is your friend against the faster classes while your learning. Its damage rate is only 5 points per hit, but at the rate it spews rounds you'll get an even 50 in a second. The only problem is hitting each round home (a nice problem for a change!).
A Sniper shooting this can still move fast so this is the one he'll switch to if he ever chases you, which he shouldn't unless you have the flag. The good Snipers will move to the next wide view shot position and take you out at medium range with the Sniper Rifle.
Its bullets don't "travel" like the nail guns so you get the damage immediately. Id say your survival rate against this gun is around 8 seconds if every round hit you.
I.E not very long, so get away again.
However, this gun does use up Sniper Rifle ammunition, so running dry will put the Sniper at a distinct disadvantage (read "he's now useless"). Good Snipers change to Nail Gun at when only 15 rounds are left. Leaving those last few for his Sniper Rifle, and perforating you instead of punching holes in you.
Also expect grenades to compliment the rounds, you know... for your troubles.
- Also don't forget the Medic's Virus kit - This will put you under due to you probably being miles from the home base.
- The Demo Man's pipe bombs are basically a cluster of rockets just waiting for you to walk on them. This often happens in Canal Zone 2 where Demo's put 8 pipes outside your base and wait for you to come out. (little tip: go out of the top if you can!).
- Every classes grenades, but especially:
- The Spy's grenade funks you up man! They don't kill you but try fighting while stoned and you'll get the idea.
- The MIRV grenade will blow you to kingdom come so TAKE COVER!
- The Concussion grenade will naff up you aiming, but I've still managed on occasion to pop the bastard who threw it! Ill get a screen shot next time for you!
OK, SO WHY TELL ME ALL THIS?
- For one very good reason, now that you know exactly what trouble your going to get into in a close range fight you may listen to some of the following tactics for staying out of them!
- Because of the fact that Half-Life is a continually expanding game and TF2 is out soon / one day / Xmas 2010 (delete as appropriate) I've decided to only focus on the transferable skills that will work on any map and allow for translation to TF2 with little problem. For specific hiding places in the maps shipped with TFC see MAP SPECIFIC HIDING POINTS.
PART ONE : STAYING OUT OF THE WAY
- Those lovely people at Valve have catered for you and me who are cursed (or in my case blessed) to be Snipers, by creating large maps with many diverse hiding areas. These allow you to stay out of the main firefight and shoot into it at will. The main way to find and remember some of these places is to follow a philosophy of staying out of the way.
- To accomplish this there are the following techniques:
- Hide behind a wall. This was discussed in BASIC SHOOTING. To expand on that a little: Stay in a place where the enemy cant see you, this involves:
- Knowing where the enemy are at all times, and knowing the most likely or usually quickest routes that the enemy will traverse.
- Using your hearing to determine where the firefights are. For example it is not unusual for the enemy to send a Soldier or HWguy up onto the Sniper nest to clean you all out before a major attack. If you are the only Sniper, your team is now at their mercy because they will have more people alive on their attack. Use your hearing effectively and you can leap off to safety.
- Placing yourself in a very easy position to attack and defend. The best place in the game is a top the base in THE WELL.
- Ducking into water, when ducked the enemy cant see you very well, and you can spring up like something out of Rambo. This is a very good technique that fly's right out of the window once a grenade is thrown at your location.
- Remember to stay a little away from the wall so the game doesn't draw you through it.
- I see some Snipers running out and then back so they can see who is there for them to target. THIS IS BAD (in my opinion) if you SLICE THE PIE as I explained earlier then you shouldn't have to do this. NEVER face the enemy with a uncharged gun, it invites death. Wait as long as you dare before charging but NOT too long that it enables the first shot to be his. A rocket in the face while charging is eminently annoying! And it gives your hiding place away somewhat.
- Place yourself in a very difficult position for the enemy to get to. This might sound difficult when rocket and grenade jumping are out of the question (usually). But the Valve maps are very well designed to be on many levels, so that a sniper on a ledge is safe from people jumping up onto that ledge, he will be vulnerable somehow but not from the front. For example the two warehouses either side of the courtyard flag in Canal Zone 2 have crates to hide behind and "slice the pie" around which are not accessible from the front. You'll still get hit from fire and grenades, but it gives you great cover of the capture point and the courtyard area.
- Place yourself in an unusual position. Ahhh! Here's the rub! Unusual positions! Many people moan incessantly about the quite plentiful positions that enable strange effects, claiming that Valve should have designed the maps better. I have news for those people, THEY DID IT ON PURPOSE. For the Sniper the whole point of the game is in developing a strategy for each different map which will enable them to take full advantage. However beyond that, what I mean is places people don't look. Example: your being chased where do you hide? There follows two examples of hiding tactics which should be used in general on any map at all.
THE NEW CIRCLE STRAFE or HOW TO SURVIVE A CLOSE RANGE BATTLE
Our Sniper friend (here shown in red) bumps into the huge lulking HWguy (represented by the blue circle). The yellow square is a big crate. Is our friend dead? NO!
He shoots the HWguy first (yellow line) because he was charged all ready, or he was using my alias which will enable a "one second" shot immediately. He then uses the time it takes the HWguy to spin up his chaingun to dart around the crate. The HWguy being of lowly intelligence will keep firing and follow him very slowly. At this point he can escape or use the time it will take the HWguy (while firing) to come around the corner to charge a second shot.
In the Screenshot below you can see that I have escaped from the HWguy, circled round behind him and am about to shoot him in the head.
However, you are like me and you love the kill, and don't like to run away from a over confident fighter. I would draw the HWguy round and then leg it backwards as shown, throwing a grenade behind me. I would first try to finish him off with a "two second" shot and then switch to Autogun and paste his ass to the wall. As I switch to Autogun the HWguy is unlikely to be thinking of anything other than killing me easily and so wouldn't make his escape. If fact I'd lay money on him not yet stopped firing. Then the grenade would go off and pop! splash damage!
This basic principle of using the heavier armoured classes in-built predisposition to regard close-range Snipers as easy kills, will save your life a million times. Anyone else let em get close and shoot them at point blank range. Another example is to stray off the beaten path a little:
OFF THE USUAL PATH or HOW I LEARNED TO SURVIVE UNWINABLE SITUATIONS
Imagine if you will, that I am here, at my favourite place for sniping on THE WELL. That is overlooking the courtyard the enemy nest and the enemy door :) There is only one weakness from this point, you can't see anyone coming up the lader until they are upon you.
Suddenly I hear the tinkle of a MIRV grenade landing at my feet! I look round and a HWguy has tossed one from the ladder without coming all the way up (he doesn't want splash damage).
How to get out of this problem?
I turn towards the grenade and throw myself off backwards from the ledge, whilst throwing one of my grenades forwards to the top of the ladder.
Result: as his grenade explodes into a frenzy of fire, he comes up the rest of the ladder straight into MY grenade. BANG!
I land (and take a hit in the armour and health from the drop). As the smoke from his grenade clears, he notices I'm no longer on the ledge, comes to where I was standing and looks over to see where I have gone.
ZAP! I blow his head off with the "Three second shot". I can then go back up the ladder and continue sniping his team mates. This manoeuvre I call the "Loop-back". Staying alive means that I can return to the sniper nest quicker than dying, having to respawn, survive the exit from my base and THEN climb back up the ladder. Re-spawning would have probably given the opposing forces time to get a sniper in position to gun me down anyway.
Again, here I was relying on the simple mind of my aggressor who would be thinking that I would simply retreat along the ledge, not that I'd give up my position. THE CORRECT position is the one you can shoot the enemy from, it is not any particular point on the map.
Now learn the team skills!
This page, pictures, and text were created by Carter. They may not be reproduced copied or printed without prior permission