Lets not forget one thing: TFC is a team game...
...it's the mother of all teams games!
So put you team thinking cap on. You need to help your team do one thing and prevent another. Namely you have to protect your flag and get theirs. The first part is easiest but as I will suggest the second par does have a role for the sniper by using the tactic of the "Roll-over".
PROTECTING YOUR FLAG
The sniper is the master of flag protection but it requires a bit of brain power to become a great defender. With his long range gun the sniper can stop the enemy before they are anywhere near your base this is your capital advantage. To use this effectively you need to be in the right position. Valve have put alot of thought into the so called sniper nests so that they generally face each other negating the advantage of the sniper and leading to sniper wars. This is what you need to avoid, the sniper war can lead to the cancelling out of both teams sniper as they just rally around killing only each other. Contrary to popular belief the sniper is not best placed to kill other snipers. Leave that to the Soldiers who can bring him down with rockets more effectively.
Like a real hunter, the single sniper will wait until the right target comes along before shooting. Once your effect on the first few waves of attacks has been assessed by the opposing team you can expect many things to happen:
A simple team will decide to rush out all at the same time, with one or two people (usually Soldiers) ordered to keep your head down. In some cases they might even change some classes into soldiers to help with their anti sniper tactics. Another tactic is too have a few HWguys come out to give cover to the Scouts but more importantly to tease you to use your charged shot on them. Wait for the scout! Take him out first and their attack has already suffered, they will almost certainly kill you for this but its worth it. if they are waiting for you to die before they bring out the scout then there are two things you can do:
Hide. Standing out in the open like a lemon is not going to win you any awards for clear thinking. You could try chucking out a grenade and retreating to your secondary positions inside you base (more about this later)
Use the geography. Consider this:
I'm here in the first map: 2Forts. As I said before a light attack can be well defended from here but you have two restrictions.
- One shot on the target + grenades.
- Nowhere to go under fire, ducking wont stop a rocket death.
A well co-ordinated heavy attack will wipe you out here.
This is more like it! From here not only do I get more shots but under fire I can move to another position like:
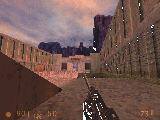 |
Here! |
 |
Or here! |
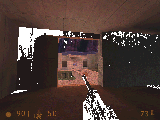 |
Or even here. All three are positions which keep me pointing the right way - at the targets. |
- A more advanced team will prong their attacks. That is to say the first wave will be a faint while the second wave comes from the back way in to get the flag. In this case you have two options:
- Move inside to carefully prepared positions. This gives you a crack at the flag grabber as he moves around your base but means that the front attack may actually get through and help him or flank you and your team.
- Stay and fight. If you survive you will almost certainly get a crack at the flag carrier who tends to take the most direct way back to your base.
Here is an attack in progress and what I did to play my part in our defence:
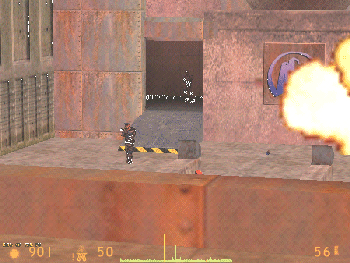
Two Opposing members are attacking the front of our base. They are a Medic and a Soldier. The Soldier take my first snap shot of one second in the chest and I get rocket damage back. But now ive shot I can move fast... ...I move to here (our other snipers position - he's just copped it) and allow the soldier onto the bridge while I aim steady. As he crosses my sights I let him have it and gib him all over the bridge!
- But effective defence is not just breaking up their attacks alone.
TEAM DEFENCE FORMATIONS
- There are a number of good team formations which give a better defence. My favourite is based on a team of 10, for more numbers double up on the Engineers and HWguys first.
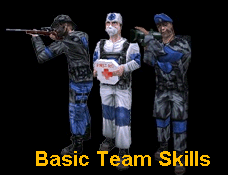
2 Snipers, 1 Medic, 1 Engineer, 1 Spy, 3 Soldiers, 1 HWguy, 1 Scout.
They key to this formation is its flexibility. The Soldiers and Scout go on the offensive and keep attacking the opposing teams generally. The HWguy acts as backup for the attacks or sits at a choke point just inside the base. His grenades can easily break up any attacks that get through. The Engineer sets up in the flag room and puts his pod thingy in a choke point like a walkway or corner. The spy does his thing against the other team (I like spy's :) ). But the best bit is the Medic / Sniper combination.
MEDIC + 2 SNIPERS
This works great. The snipers work in pairs selecting targets using comms scripts (see further down). The Medic works by defending them from close attacks (such as Soldier who often rocket jump up to sniper nests) and backs them up from the rush by using his grenades. The reason to have a medic is that by infecting the Soldiers, even if they break through they aren't going to help their team for long.
The flexibility part of this formation is the speed at which the team can switch from defence to attack either in part or in whole. The snipers can work top and bottom of the nest moving around and following the rules laid out above about keeping in good positions, while the rest of the team do their part, when suddenly the other team throws a full attack!
Opposing members, on a signal, rush from their base towards yours. They break into two prongs working in 5 sets of 2's. They throw grenades everywhere and burst out of the back way in. But your team is ready for them. The snipers throw their grenades, take their charged shots and then move back inside the base with the medic. The Soldiers congregate in the hallway around the flag and the Engineer runs the resurply. The spy's knife them in the back, while the HWguys keep the corners clear. Using this method an attacking team will find it very difficult to move inside the base, which will resemble a pin cushion. Power at a point is the best form of defence.
THE 2 SNIPER TEAM
Rather than Snipers sitting around on their own independent of their team-mates the two sniper team offers alot more attacking and defending options. Using a common script they can work off each other.
You've seen the film "Zulu" right?
At the end of the film, the English faced with superior Zulu numbers charging straight towards them adopt a line of shooters, who fire in order. One after the other! This gives the Sniper not shooting time to recharge his shot. Effective Sniper teams of 2 (or in big games even 3 or 4) can keep any enemy completely pinned down.
Here is a quick list of the sort of things a Sniper needs in his TEAM comms script:
(Using the F keys)
F1 : HELP!F2 : Enemy flag carrier down, flag in open.F3 : On D. (D = Defence. You team will see "<Yourname> on D")F4 : I'm attacking now.F5 : I'm hunting now. (See Advanced Team Skills)F6 : Flag carrier I have you covered.The following are not TEAM ONLY:F7 : Nice one! :) (Always be nice to your team and the other)F8 : GG :) (GG = Good Game).F9 : Away From Game. BRB. (BRB = Be Right Back)F10 : ZAP!F11 : Headshot!F12 : See you all laters, I'm off. Bye!
Once the attack is over your team can move back into neutral play, from there it can move into attacking:
ATTACKING THEIR FLAG
The attack starts with the snipers who switch to taking out all opposing snipers, the Medic takes the first charge while the rest of the team group up apart from the Engineers who keep upgrading and stay on defence. Then at a word they rush across towards the opponents base in 2 teams of four. 3 Soldiers and a HWguy to soften up the defence and then one Sniper, Medic, Scout, and the Spy to follow up. the Sniper heads for the opponents Sniper nest. When the Scout has captured the flag both Snipers work cover from both nests.
A good Sniper can move from attack to defence and back again very quickly. The Sniper attack is very carefully executed. There are 2 ways to be effective:
- Run into their base and then charge up a shot. start moving round their base slowly being very careful when going around corners to "slice the pie" and keep you shot on. Have you other Snipers back you up to give you a wall of fire.
- Sneak into their base and find a hidden position. (There's a good one in The Well)
SNIPER + SOLDIER TEAM
This team playing style works great!
The sniper marks the targets and the soldier clears out the opposing sniper nest. The trick is to keep in contact with the soldier.

This page, pictures, and text were created by Carter. They may not be reproduced copied or printed without prior permission