

Click the above picture to return to the map selection page
THE HUNTED
(Some of the pictures here have been brightened to ease viewing).
Objective:
The Hunted: Make it to the white truck waiting for you behind the doors at the edge of the Helipad.
The Bodyguards: Prevent the Assassins from killing The Hunted before he gets to the truck.
The Assassins: Kill The Hunted.
Scoring:
The Hunted: 50 points each time he makes it to the truck.
The Bodyguards: 50 points each time The Hunted makes it to the truck.
The Assassins: 25 points each time The Hunted is killed.
Notes:
There is a limit of 5 players on the Assassin team, and Assassins may only choose the Sniper class.
Bodyguard team has no player limit, but Bodyguards may only choose the Soldier, Heavy Weapons Guy, and Medic classes.
Whenever The Hunted is killed or makes it to the truck, every player in the game is respawned back at their starting positions.
The truck is parked behind the doors at the edge of the Helipad. The doors can be opened by pressing a button in either of the towers next to the doors. The doors don't stay open for long, so The Hunted needs to move fast.
THE MAP
(Please note that this map is not to scale particularly)
 |
This is the basic layout of the hunted map. I say
basic because it is insanely complicated so stay with me
while I run you through it. The map is basically split into two sections (Yellow and blue). The green circle and green lines represent the starting point and common running paths of the president. his objective is to get to the car between the two blue dots, which are the controls which open the garage doors. The red circles represent the entrances to the underground tunnels and they are all connected. Solid shapes are boxes. Below I'll discuss each section in detail. |
HOW TO PLAY THIS MAP
This map is very popular with snipers. All you have to do is kill the president while staying away from the guards. This is the key to this map and gives two basic ways of playing it:
- Find a spot and stay there until he comes past.
- Roam around and attack him.
Type one is best played in the yellow section of the map, while style two is best played in the blue section.
ROAM AROUND AND KILL HIM.
Covering the first building.
Covering his path of movement is always the hardest style and position to play, but is definitely the most exciting. Remember you can always play this way until you get killed and then roll over to the yellow section.
Here is the first position everyone comes to know and hate. This is atop the roof of the first building the president has to move past. This section as you can see gives you a ok shot at him as he rounds the ramp corner. however this point will come under enormous fire from guards and is also the first place that rocket jumping soldiers will head for. They can jump right up on you from here and will almost certainly kill you.
This is a much better position. For the enemy to see you here they must turns their heads totally around and catch you hiding up against the wall. here you do not present such a clear target silhouetted against the sky, and also the enemy will first look to the above position. The best part of this section is that you will get a straight head shot and a follow up before anyone manages to move right up the ramp. Also should you come under fire you can drop down to the boxes on the left and take another shot if you have time.
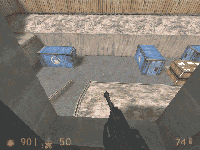
This point is in one of the windows, shown on the right picture. This point has a good field of fire and some cover from the window. The best thing about it is that its right next to the resupply room and you are totally safe from the enemy getting too close.
Tunnel rat tactics.


...boxes here. Which offers a good shot at the enemy and access to the tunnels as shown in the left picture.


Once in the tunnels you can come up here which has a resupply and is safe until you open the doors and face the enemy once more.
From the tunnel in the resupply you can move right around to this section...


This one is always the suprise! Right inside the opponents base where they feel the most protected. just remember you cant shoot until you clear the ladder so make it quick! The second picture shows what you can do if you have balls of steel. This is a picture form inside the enemies truck. The trick is to keep your red dot hidden on the box like I have here. Just remember you ARE going to die in this position but if you've great luck you 'll get them before they get you.

This is the final tunnel entrance and is a good way of crossing the map when playing against a large enemy.
Holding the centre.

Here you can climb up and cover the middle corridor.
Here you can hit some enemy, but...
... here you can take out anyone attacking the roof to the right and also take out anyone in the middle corridor while being safe from rocket jumping soldiers.
The secret Tunnel.
- There is a great little method of getting into the opponents base. It involves a little running around but ive seen it pay of well if timed correctly.
This is what it looks like for the enemy, but how to get there?

Running through to the yellow section of the map you can enter this building to move to covering fire of the courtyard.

however before running up the ramp you might consider this drop shown on the right. One thing to consider though is that most enemies will attack the opening before moving past, so jump down at the very last moment.
From here you can get off ONE shot at the president as he passes, so make it count.
FIND A SPOT AND STAY THERE UNTIL HE COMES PAST.
Carter's favourites.
This is under the ramp in the first building and is a good chance because it gives you a dark place to hide until the blighter comes past.
this point enables you to have one shot from here and then roll over to the positions below so that you can hit him as he move through the second section. Although this point will come under alot of fire especially from grenades, there are many escape roots.

From the position above you can move to here which as the zoomed in version shows you, gives you great coverage of the courtyard. however its a bit of a death trap in here and also there is another way the hunted to move past you.


At the end of the ramp there sits a good room to hide in. at this point you are at the last stand before the president gets away. On this box you can take one pot shot before being wasted. The trick is to hide halfway up the ladder until he is within shooting range, this enables you to get your shot off before the enemy hits you down. Also there is no escape here from the enemy if trapped.

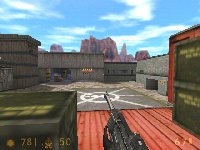
The other side of the courtyard, you can jump up on this set of boxes and hide behind the ammo crates until a target comes along.


This position is in the tower as shown in the right side picture. A very good coverage but you will get wasted quickly. However, if you remain unseen you can cause havoc when some one comes up he stairs. What happens is that they enemy have a very tight knit team. The president is relying on the person coming up the ladder to open the garage doorway because he has already made his run for it. If you zap the button pusher then the president can get trapped in the open and be mercifully cut down by sniper fire. The final picture shows a good way to defend the ladder. You can actually shoot as long as you stand at the very top.
My three favourite places are below
This is actually inside the garage! Open it yourself and stay there until the president makes the mistake of running to the car. Be warned though you only get one shot at him before he makes it to freedom. I love this position because there is nothing better than the look on his face, sure of his impending freedom and the brilliance of his team when ZAP! The smeggers dead! Very satisfying.

From here you can stay safe, while at the same time taking out anyone moving up the ramp. The only problems from here are firstly that it is possible for soldiers cleaning out sniper nests to rocket jump up to your right. If that should happen you will find it very hard to survive becuase jumping down puts you in front of any other enemies. If you should have the chance you could run along the thin ledge to escape, but youll still get a rocket up the arse. The second problem is that you have to just sit there and wait... and wait... and wait... Although its well worth it if your a clan. Thanks to colin the spy for the first weakness.

Should he get away from you here then you can move to this ladder and up to cover the courtyard, for a second chance.
THE HUNTED BASICS.
The ten things you should keep in mind when playing THE HUNTED:
- There are many many places to hide, so if you've the time and don't mind waiting stay still.
- Moving around gets you killed.
- Always have a exit.
- Don't stand to close to windows as defenders will see you.
- Rockets cause splash damage so don't stay too close to walls if possible.
- Don't always return to the same place. Have the ability to "roll over" to other positions.
- Practice getting around the map quickly using the roof or the tunnels.
- As the SAS says "He who dares wins".
- Only shoot at those who have seen you, will see you, and the president.
- GO FOR HEAD SHOTS! You really don't have time to be messing around.
Team basics
This map is not really a team event for your side (snipers) unless you have time to practice. However you can try:
- Sniper rush. Everyone rushes in and try's to get close enough to kill the president. When you die roll over into better positions.
- Sniper Wall. Like in the Alamo and the Zulu wars try all have overlapping fields of fire and make the enemy keep their heads down. this only really works if you have speech software installed and are in quick communication with your team mates.
- Bottle Neck. Similar to "Sniper wall" this means finding one area the enemy has to pass and keeping them there while a second tam of two moves round behind them
- Roll Over. This works the best. Splitting the map up like I proposed you can work first one side and "roll over" to the more defensive side once and if the president makes it past your team.
This page, pictures, and text were created by Carter. They may not be reproduced copied or printed without prior permission


